Follow us on instagram for more pics: @bigtreeandkoala :)
~
MAKING OF THE L.O.V.E SCULPTURE
written by Big Tree
~
This L.O.V.E sculpture is specially made for my dearest Koala who in this 7 years never fails to filled my life with love, going through thick and thin together. The sculpture took about 3 months to complete, using every second of my free time. Although the making process is tedious, it is all worth it. =)
The L.O.V.E sculpture is 1.2m tall by 1.2m wide and is 20cm deep. It has 105 photos of us during our 7 years together.
Materials procurement
Materials required
1. Styrofoam 4x8 ft, 4 inch thick, Qty 1, for the sculpture. The 4x8 ft styrofoam were too big to be transported. Thus, they were cut into 4 parts as in the picture.
2. High density styrofoam 2x4 ft, 2 inch thick, Qty 1, for the base
3. Aluminium sheet, for the face and edges of the sculpture
All the above are purchased from Khiang Hor Building Products, recommended my by Dad, who used to be a renovation contractor. The items there are half the price of Art Friend!
4. Red and Black vinyl stickers, to wrap the sculpture and the base respectively
The stickers are bought from Teck Seng Enterprises. They specialise in vinyl stickers of all types and colours.
5. Wooden rod, for securing the letters together
6. Transparent PVC, for protecting the photos
Item 5 and 6 were bought from Art Friend
Step 4: Allocating the styrofoams to their letters
Step 5: Draw the letters onto the styrofoam. As the styrofoam is only 4 inch thick, each letter will have 2 styrofoams joined together.
Step 7: Trimming the edges using styrofoam cutter from Art Friend.
Step 8: Joining the letters together so that they become 8 inch thick. I used cable ties to join them together. Below is the bare white L.O.V.E sculpture. A huge milestone cleared. =)
Step 10: Sticking the red vinyl sticker onto the face letters. The sticking process requires 2 people to execute, one to taut the sticker, and the other to stick it onto the aluminium, ensuring that there is no bubble.
And now the L.O.V.E sculpture becomes red =D
Step 11: Pasting the photos onto the sculpture. This is rather time consuming as I have to keep shuffling the photos to ensure that the photos cover almost every space and none of our faces will get chopped off after trimming the edges.
Finally, after much rearrangement...
Step 13: Sticking the red vinyl sticker onto the side, and the letters are done
Step 14: Now will be the base. Cut the high density styrofoam into half and join them together such that the dimension is now 1x4 ft and 4 inch thick. Protect the edges using aluminium sheet and finally stick the black vinyl sticker over the base.
Step 16: Finally, after assembling the letters together, below is the finished L.O.V.E sculpture =)
After months of hard work..finally is done =) Satisfied =)
Next post I will share the inspiration of Proposal.. Where I get the ideas from =)
MAKING OF THE L.O.V.E SCULPTURE
written by Big Tree
~
This L.O.V.E sculpture is specially made for my dearest Koala who in this 7 years never fails to filled my life with love, going through thick and thin together. The sculpture took about 3 months to complete, using every second of my free time. Although the making process is tedious, it is all worth it. =)
The L.O.V.E sculpture is 1.2m tall by 1.2m wide and is 20cm deep. It has 105 photos of us during our 7 years together.
Materials procurement
Materials required
1. Styrofoam 4x8 ft, 4 inch thick, Qty 1, for the sculpture. The 4x8 ft styrofoam were too big to be transported. Thus, they were cut into 4 parts as in the picture.
2. High density styrofoam 2x4 ft, 2 inch thick, Qty 1, for the base
3. Aluminium sheet, for the face and edges of the sculpture
All the above are purchased from Khiang Hor Building Products, recommended my by Dad, who used to be a renovation contractor. The items there are half the price of Art Friend!
4. Red and Black vinyl stickers, to wrap the sculpture and the base respectively
The stickers are bought from Teck Seng Enterprises. They specialise in vinyl stickers of all types and colours.
5. Wooden rod, for securing the letters together
6. Transparent PVC, for protecting the photos
Item 5 and 6 were bought from Art Friend
The Construction
Step 1: Getting the measurement of the sculpture.
Step 2: Scale up the measurements and draw them onto the aluminium sheet.
Step 3: Cut the letters out and file the edges and corners
and place the letters together. Dimension is good, satisfied =)
Step 4: Allocating the styrofoams to their letters
Step 5: Draw the letters onto the styrofoam. As the styrofoam is only 4 inch thick, each letter will have 2 styrofoams joined together.
Step 6: Cut the letters out. I used a cooking knife because there is no other knife with blade that long to cut through the 4 inch thick styrofoam. Very messy when cutting and spent a lot of time cleaning up the area.
Step 7: Trimming the edges using styrofoam cutter from Art Friend.
Step 8: Joining the letters together so that they become 8 inch thick. I used cable ties to join them together. Below is the bare white L.O.V.E sculpture. A huge milestone cleared. =)
Step 9: Protecting the face and edges of the letters with the aluminium sheet.
Tada, from white to shiny sliver L.O.V.E sculpture
Step 10: Sticking the red vinyl sticker onto the face letters. The sticking process requires 2 people to execute, one to taut the sticker, and the other to stick it onto the aluminium, ensuring that there is no bubble.
And now the L.O.V.E sculpture becomes red =D
Step 11: Pasting the photos onto the sculpture. This is rather time consuming as I have to keep shuffling the photos to ensure that the photos cover almost every space and none of our faces will get chopped off after trimming the edges.
Finally, after much rearrangement...
Step 12: Trimming the edges of the photos and putting a layer of PVC over the photos to protect them.
Step 13: Sticking the red vinyl sticker onto the side, and the letters are done
Step 14: Now will be the base. Cut the high density styrofoam into half and join them together such that the dimension is now 1x4 ft and 4 inch thick. Protect the edges using aluminium sheet and finally stick the black vinyl sticker over the base.
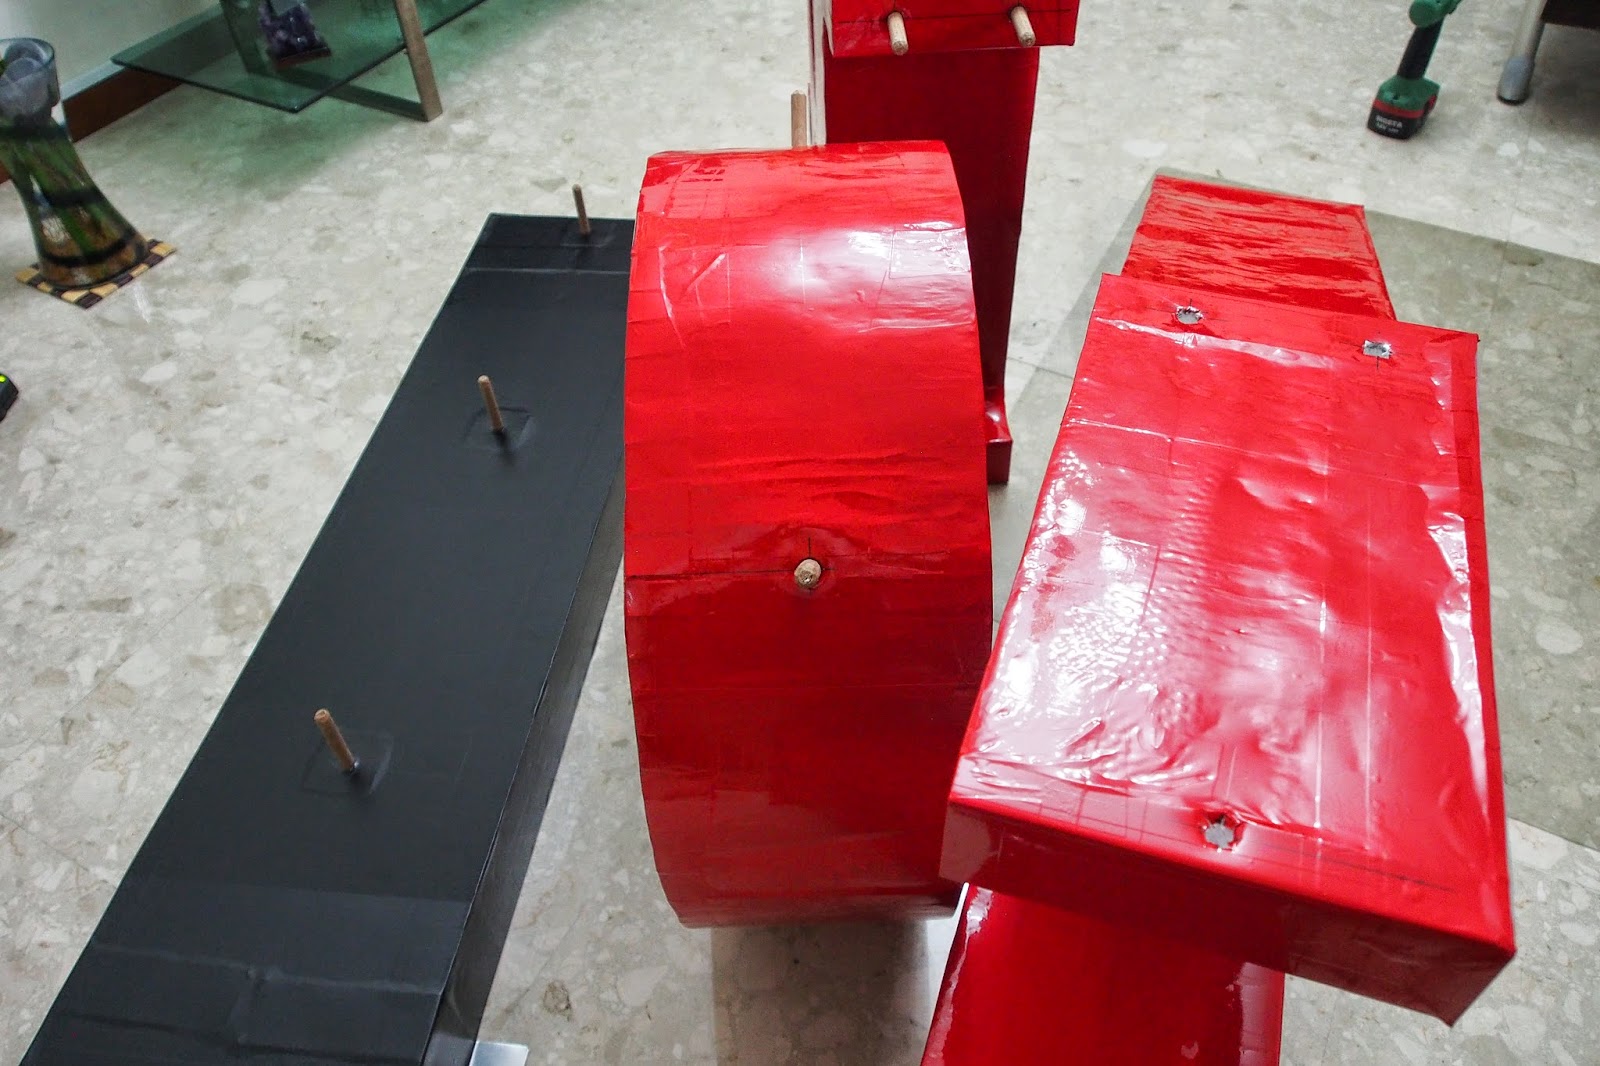
Step 15: Place the letters together and mark out the mounting holes. Once done, drill the holes and stick the wooden rods.
Step 16: Finally, after assembling the letters together, below is the finished L.O.V.E sculpture =)
After months of hard work..finally is done =) Satisfied =)
Next post I will share the inspiration of Proposal.. Where I get the ideas from =)
Advertisement
Popular Posts
- Anniversary (1)
- In Singapore... (5)
- loveokab (1)
- loveokabsg (1)
- Make Up (1)
- New Year Resolution (2)
- Our Home (6)
- Photoshoot (4)
- Pregnancy (4)
- Product Review (10)
- shoesthatloveyou (1)
- Sponsored Post (13)
- Travel / Bangkok 2014 (5)
- Travel / New Zealand 2016 (1)
- Travel / Phuket 2014 (4)
- Travel Tips (9)
- Wedding (19)


Lots of effort.. salute ur husband!
You and your bf don't stay together? How come you dono he is making that for you? Your bf can be art and craft teacher. Fantastic work there with lots of effort and love. You are blessed with everything a lady could asked for. Update more often, you both are the best looking and most lovely couple I came across. Continue to stay sweet! : )
We do not stay together. That is why we are longing for our HDB to come asap. =)
Hi, I am interested to do the LOVE sculpture! Can I get from you the measurement of the letterings for the sculpture?